Help/Support
Like
Contact
Cara Membuat Label Keren dan Unik Di Blog - Part II

Cara Membuat Label Keren dan Unik Di Blog - Part II

Cara Membuat Label Keren dan Unik Di Blog - Part II : Salam kawan kali ini saya kembali akan membagikan artikel tentang seputar dunia blogger dan kali ini saya akan membagiak artikel mengenai bagaimana cara membuat label keren di blog dan pastinya akan menambah cantiknya blog kalian untuk para pengunjung yang datang ke blog kalian kawan. Dalam dunia blogger artikel yang original dan template yang responsive itu harus, tapi apakah tidak boleh kita mempercantik blog kita dengan bagus. Nah itu dia fungsinya kita harus lebih banyak belajar lagi tentang seputar dunia blogger untuk kedepannya. 

Label itu adalah sebuah fitur yang digunakan untuk mengkategorikan artikel atau postingan suatu blog dimana akan memudahkan pengunjung untuk mencari artikel yang merekan inginkan sesuai dengan kategor pada label blog kalian kawan. Membicarakan tentan blog saya sangat suka sekali mengedit template blog saya, tapi ingat template blog jangan selalu di modifikasi karena akan mengurangi atau juga menurunkan performa blog kalian di mata google nantinya. Kali ini saya juga memberitahukan bagaimana cara memasang label yang keren dan juga akan mempercantik atau memperganteng blog kalian. 

Langkah-langkah yang harus kalian lakukan untuk membuat label yang keren dan unik di blog : 

Cara mengatur atau memasang label pada blog :

  1. pertama kalian harus login pada blog
  2. kedua kalian pilih menu tata letak --> tambahkan gadget --> pilih label
  3. atur sesuai yang kalian inginkan
  4. diwajibkan pilih label dengan tampilan cloud
  5. lalu simpan.

Cara Memodifikasi Label Dengan CSS :

  1. pertama kalian harus login pada blog
  2. Pertama kalian pilih menu template --> sesuaikan --> lanjutan --> tambahkan CSS
  3. kedua masukan kode script yang saya siapkan kedalam kotak tambahkan CSS  
  4. Terapkan ke blog, lalu lihat hasilnya pada blog kalian. 

Style 1


Kode CSS : 

.label-size{ margin:0; padding:0; position:relative; } .label-size a{ float:left; height:24px; line-height:24px; position:relative; font-size:12px; margin-bottom: 9px; margin-left:20px; padding:0 10px 0 12px; background:#0089e0; color:#fff; text-decoration:none; -moz-border-radius-bottomright:4px; -webkit-border-bottom-right-radius:4px; border-bottom-right-radius:4px; -moz-border-radius-topright:4px; -webkit-border-top-right-radius:4px; border-top-right-radius:4px; } .label-size a:before{ content:””; float:left; position:absolute; top:0; left:-12px; width:0; height:0; border-color:transparent #0089e0 transparent transparent; border-style:solid; border-width:12px 12px 12px 0; } .label-size a:after{ content:””; position:absolute; top:10px; left:0; float:left; width:4px; height:4px; -moz-border-radius:2px; -webkit-border-radius:2px; border-radius:2px; background:#fff; -moz-box-shadow:-1px -1px 2px #004977; -webkit-box-shadow:-1px -1px 2px #004977; box-shadow:-1px -1px 2px #004977; } .label-size a:hover{background:#555;} .label-size a:hover:before{border-color:transparent #555 transparent transparent;}

Style 2

Kode CSS : 

.label-size-1,.label-size-2,.label-size-3,.label-size-4,.label-size-5{font-size:100%;filter:alpha(100);opacity:10} .cloud-label-widget-content{text-align:left} .label-size{background:#08A2FA;border-radius:30px;display:block;float:left;margin:0 3px 3px 0;color:#ffffff;font-size:11px;text-transform:uppercase} .label-size a,.label-size span{display:inline-block;color:#ffffff!important;padding:6px 8px;font-weight:bold} .label-size:hover{background:#000000} .label-count{white-space:nowrap;padding-right:3px;margin-left:-3px;background:#000000;color:#fff!important} .label-size{line-height:1.2}

Style 3

Kode CSS :

.label-size { display:inline-block; margin: 0 4px 4px 0; padding:7px; font:13px verdana; float:left; background: #FF0000; -webkit-transform: translateZ(0); transform: translateZ(0); box-shadow: 0 0 1px rgba(0, 0, 0, 0); } .label-size:before { pointer-events: none; position: absolute; content: ''; height: 0; width: 0; top: 0; right: 0; background: linear-gradient(225deg, white 45%, #aaaaaa 50%, #cccccc 56%, white 80%); box-shadow: -1px 1px 1px rgba(0, 0, 0, 0.4); -webkit-transition-duration: 0.3s; transition-duration: 0.3s; -webkit-transition-property: width, height; transition-property: width, height; } .label-size:hover:before, .label-size:focus:before, .label-size:active:before { width: 16px; height: 16px; } .label-size a {color: #fff; text-decoration:none;}

Untuk mengubah warnanya kalian harus mengetahui dulu kode script warna pada pemrograman dan kalian tinggal menggantinya dengan  atau pada script label yang ada di kode CSS di atas.

Demikian postingan saya tentan bagaimana cara mengubah tampilah abel dan Cara Membuat Label Keren dan Unik Di Blog - Part II dan semoga bermanfaat untuk kalian agar kalian bisa terus semangat ngeblog dan juga jangan lelah untuk belajar, belajar dan belajar. terima kasih.

Like
ccc

Add to Cart

Cara Membuat Label Keren Dan Unik Di Blog - Part I

Cara Membuat Label Keren Dan Unik Di Blog - Part I

Cara Membuat Label Keren Dan Unik Di Blog - Salam kawan kali ini saya akan membagikan artikel tentang dunia komputer dan dunia blogging. Postingan yang saya bagikan adalah postingan mengenai bagaimana cara membuat label keren dan unik di blog yang tentunya akan membuat tampilan blog kalian menjadi lebih kece dan menarik. Dalam dunia blogging itu sendiri kita sering yang namanya dalam mengatur tampilan blog banyak yang tidak tahu bagaimana caranya dan juga asal-asalan. 

 Apa Itu Label pada Blogger ?

Nah, dalam blogger, label adalah penanda atau fitur untuk menunjukan tentan beberapa postingan dan sebagai penanda postingan untuk mengkategorikan artikel atau postingan yang kita punya ke dalam sub-sub tertentu. Label itu sendiri berfungsi untuk para pengunjung blog kita agar supaya merekan lebih mudah dalam mencari artikel yang mereka inginkan dengan berdasar pada label atau kategory tertentu yang merekan inginkan. Pemberian label itu juga akan berpengaruh pada SEO blog kita dan itu juga bisa untuk meningkatkan SEO blog kita juga. Kebanyakan untuk pada blogger yang sudah handal merekan biasanya meletakkan label pada sidebar karena posisi ini memang cukup optimal dalam menarik dan mempermudah pengunjung mencari artikel yang merekan inginkan.

Cara mengatur atau memasang label pada blog :
  1. pertama kalian harus login pada blog
  2. kedua kalian pilih menu tata letak --> tambahkan gadget --> pilih label
  3. atur sesuai yang kalian inginkan
  4. diwajibkan pilih label dengan tampilan cloud
  5. lalu simpan.
Cara Memodifikasi Label Dengan CSS :
  1. pertama kalian harus login pada blog
  2. Pertama kalian pilih menu template --> sesuaikan --> lanjutan --> tambahkan CSS
  3. kedua masukan kode script yang saya siapkan kedalam kotak tambahkan CSS
  4. Terapkan ke blog, lalu lihat hasilnya pada blog kalian. 

Style Merah Keren 

Cara Membuat Label Keren Dan Unik Di Blog

Kode CSS :

.label-size-1,.label-size-2,.label-size-3,.label-size-4,.label-size-5{font-size:100%;filter:alpha(100);opacity:10} .cloud-label-widget-content{text-align:left} .label-size{border:5px dashed #000000;border-bottom-right-radius:30px;border-top-left-radius:30px;background:#FA0830;display:block;float:left;margin:0 3px 3px 0;color:#ffffff;font-size:11px;text-transform:uppercase} .label-size a,.label-size span{display:inline-block;color:#ffffff!important;padding:6px 8px;font-weight:bold} .label-size:hover{border:5px dashed #FA0830;background:#000000} .label-count{white-space:nowrap;border-bottom-right-radius:30px;border-top-left-radius:30px;padding-right:3px;margin-left:-3px;background:#000000;color:#fff!important} .label-size{line-height:1.2}

 Style Biru Unik 

Cara Membuat Label Keren Dan Unik Di Blog

Kode CSS :

.label-size-1,.label-size-2,.label-size-3,.label-size-4,.label-size-5{font-size:100%;filter:alpha(100);opacity:10} .cloud-label-widget-content{text-align:left} .label-size{border:5px dashed #000000;border-bottom-right-radius:30px;border-top-left-radius:30px;background:#FA0830;display:block;float:left;margin:0 3px 3px 0;color:#ffffff;font-size:11px;text-transform:uppercase} .label-size a,.label-size span{display:inline-block;color:#ffffff!important;padding:6px 8px;font-weight:bold} .label-size:hover{border:5px dashed #FA0830;background:#000000} .label-count{white-space:nowrap;border-bottom-right-radius:30px;border-top-left-radius:30px;padding-right:3px;margin-left:-3px;background:#000000;color:#fff!important} .label-size{line-height:1.2}


Demikian yang bisa saya sampaikan pada postingan tentang Cara Membuat Label Keren Dan Unik Di Blog - Part I dan untuk kelanjutannya kalian bisa tunggu dan saya mohon maaf yang sebesar-besarnya dan juga tak lupa saya ucapkan terima kasih. SAMPAI JUMPA LAGI.
Like
ccc

Add to Cart

Photoshop Template Dream Photo

Photoshop Template Dream Photo

Photoshop Template Dream Photo
Posting kali ini blog senirupa akan membagikan kepada anda sebuah template Photoshop yang bertitel Dream Photo. Template Photoshop ini akan menghasilkan effect Foto anda seperti contoh gambar diatas hanya dengan beberapa kali Klik, penggunaannya sangat simpel dan mudah. Anda hanya perlu menyiapkan Foto  atau gambar yang ingin dijadikan seperti effect gambar foto artis cantik diatas.
jika anda tertarik berikut akan saya uraikan tata cara penggunaannya.
  1. Silahkan download file template photoshop diatas dengan mengklik link yang kami sertakan paling bawah.
  2. Siapkan foto atau image yang ingin anda jadikan seperti effect template diatas.
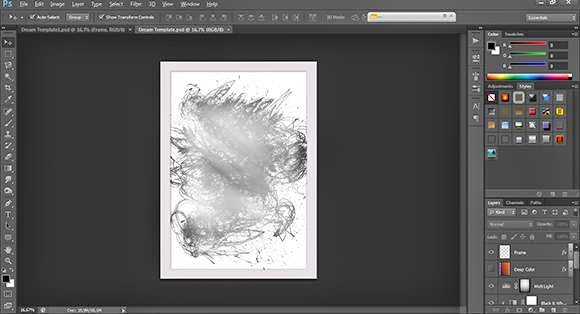
  3. Buka file Template Photoshop yang berekstensi .psd pada program adobe Photoshop anda, dan tampilannya kira-kira seperti gambar dibawah. 


  4. Photoshop Template Dream Photo

  5. Klik Layer seperti pada gambar dibawah dan pilih Ok

  6. Photoshop Template Dream Photo

  7. Silahkan Paste Foto atau image anda pada layer seperti diperlihat pada gambar.

  8. Photoshop Template Dream Photo

  9. Kemudian pilih Close dan simpan..

  10. Photoshop Template Dream Photo

  11. Mudah dan simpel bukan
 Photoshop Template Dream Photo : Download
    Like
    ccc

    Add to Cart

    Video Tutorial Coreldraw Bahasa Indonesia

    Video Tutorial Coreldraw Bahasa Indonesia

    Video Tutorial Coreldraw Bahasa Indonesia

    Video Tutorial Coreldraw Bahasa Indonesia

    Tutorial Coreldraw bahasa indonesia yang ingin saya bagikan kepada anda adalah hasil produksi dari elexmedia komputindo. didalamnya berisi tentang teknik-teknik pembuatan karya senirupa design graphis dengan mengolah garis dan warna. anda akan langsung diajak untuk mempraktekkan membuat karya senirupa graphic design seperti pembuatan Logo, Brosur desain kalender dan lain-lain. anda juga akan mendapatkan teknik - teknik penggunaan Aplikasi design Vector Coreldraw yang mungkin barangkali anda belum mengetahuinya.

    Tutorial Coreldraw bahasa indonesia ini sangat bermanfaat bagi anda yang bergelut atau tertarik mempelajari lebih lanjut tentang aplikasi Coreldraw, dengan pembahasan yang sangat simpel, mudah dan langsung praktek untuk membuat karya senirupa design graphic anda.

    Sebelumnya saya sudah membagikan kepada anda Video Tutorial Photoshop Bahasa Indonesia, jika anda tertarik silahkan menuju link yang saya bagikan. Akhirnya semoga video tutorial coreldraw bahasa indonesia ini bermanfaat bagi anda semua, salam senirupa.


    Video Tutorial Coreldraw Bahasa Indonesia

    sebelumnya saya meminta maaf karena file ini terbagi dalam banyak part (13part). sapidol ane akhir-akhir ini lelet banget gan. makanya video tutorial bahasa indonesia yang lain malas aku upload ulang.

    Tutorial Detail :

    Titel : Video Tutorial Coreldraw Bahasa Indonesia
    Label : Kekuatan garis dan warna
    Publisher : Elexmedia Komputindo
    File Type : Dynamic learning exe
    Besar File : 624 MB
    Download : Indowebster


    Like
    ccc

    Add to Cart

    Photoshop Top Secret DVD 3 Free Download

    Photoshop Top Secret DVD 3 Free Download

    Photoshop Top Secret DVD 3
    Photoshop Top Secret DVD 3
    DVD-Iso File | Learning | 3,56 GB

    Melanjutkan posting sebelumnya yaitu Video Tutorial Photoshop Top Secret Series yang berjumlah 4  seri DVD dan 2 dvd Bonus, kali ini saya akan membagikan kepada anda semua Photoshop Top Secret DVD 3. anda bisa mendownload file Photoshop Top Secret DVD 3 secara gratis, format file dalam bentuk iso sebesar 3, 56 GB. file memang lumayan besar tapi anda tidak perlu kuatir karena anda dapat menghentikan untuk sementara dan melanjutkan kembali untuk men download gratis Photoshop Top Secret DVD 3 ini.

    Author:
    Mark Monciardini: Dalam menjalankan untuk International Photoshop Hall of Penghargaan of Fame oleh Asosiasi Nasional Profesional Photoshop, pemenang Penghargaan Jury Worth1000 Grand dan terdaftar oleh Wacom sebagai salah satu dari Top 40 mereka ahli Photoshop, Mark telah mengajarkan Jutaan tips orang Photoshop di website sejak 1998. Dia juga memberikan kontribusi keahliannya untuk puluhan Photoshop publikasi dan ruang kelas secara nasional dan internasional.

    Bagaimana Menjadi Photoshop "Black Belt"-Cepat Hanya dirilis oleh Mark Monciardini, Rahasia Photoshop Top adalah Photoshop Ekstrim Kursus Pelatihan yang mengajarkan Anda, langkah demi langkah, cara membuat cutting-edge grafis dan efek khusus dengan Adobe Photoshop.! Ini siswa-ramah di rumah kursus belajar meliputi empat DVD-ROM dengan lebih dari 16 gigabyte video tutorial dan file proyek. Hal ini juga dilengkapi dengan sebuah buku galeri penuh warna (cetak, bukan pdf) yang menunjukkan hasil akhir dari setiap proyek dalam kursus. Anda dapat melihat, belajar, berlatih, dan menguasai teknik-teknik canggih di mana pun Anda berada, tanpa perlu untuk kelas mahal atau tutor.

    Content Photoshop Top Secret DVD 3:

    Photoshop Top Secret DVD 3


    Flying out of Bounds

    Photoshop Top Secret DVD 3

    1. Getting Started
    2. Frame Shape
    3. Isolating Snow Boarder
    4. Transparent Snow
    5. Frame and Border
    6. Final Detail
    Time: 32 Minute
    Instructor: Mark Monciardini
    Description Create the classic "out of bounds" effect with a very cool masking trick

    Reaching out of Bounds

    Photoshop Top Secret DVD 3
    1. Getting started
    2. Isolating Parts
    3. Adding Reflection
    4. Masking the frame
    5. Overlay custom colour
    Time: 24 Minutes
    Instructor: Mark Monciardini
    Description: Creating the illusion of arms and hands reaching out of a picture frame


    Chocolate Milk Frog

    Photoshop Top Secret DVD 3
    1. Introduction
    2. Cropping
    3. Colorizing
    4. Smudging Skin
    5. Making The Drips
    6. Highlights
    7. Smudging Highlights
    8. Final Touches
    Time: 1 Hour 9 Minutes
    Instructor: Mark Monciardini
    Description: How to make a frog covered in chocolate


    Covered with Wax

    Photoshop Top Secret DVD 3
    1. Getting Started
    2. Setting wax color
    3. Starting the wax texture
    4. Adding wax drips
    5. Adding soft highlights
    6. Adding Sharp highlights
    7. Extra wax tips
    Time: 40 Minutes
    Instructor: Mark Monciardini
    Description: Choose an object and cover it with melting wax

    Grunge Look

    Photoshop Top Secret DVD 3

    1. Getting started
    2. Creating grungy text
    3. Starting Texture
    4. Texture color and blotches
    5. Adding Final details
    Time: 37 Minutes
    Instructor: Mark Monciardini
    Description: Create a unique grunge background that can be used for almost anything.


    Square Fruit

    Photoshop Top Secret DVD 3


    Time: 37 Minutes
    Instructor: Mark Monciardini
    Description: Play with mother nature by changing the shape of fruit


    Invisible Man

    Photoshop Top Secret DVD 3

    Time: 56 Minutes
    Instructor: Mark Monciardini
    Description: How to make a person vanish from their clothing


    Metal Collage

    Photoshop Top Secret DVD 3

    Time: 25 Minuteses
    Instructor: Mark Monciardini
    Description: How to create a Robot with pieces of a Photo and then place it into another world


    Morphing Creatures

    Photoshop Top Secret DVD 3

    Time: 1 Hour 2 Minutes
    Instructor: Mark Monciardini
    Description: Morph animals and reptiles together to create interesting creatures


    Using Layer Comps

    Photoshop Top Secret DVD 3

    Time: 11 Minutes
    Instructor: Mark Monciardini
    Description: How to create multiple layouts in one Photoshop file using Layer Comps.


    Webpage: http://www.photoshoptopsecret.com
    Download Photoshop Top Secret DVD 3: Click Here


    Like
    ccc

    Add to Cart

    Photoshop Top Secret DVD 2 Free Download

    Photoshop Top Secret DVD 2 Free Download

    Photoshop Top Secret DVD 2

    Photoshop Top Secret DVD 2 Adobe Photoshop Training Course

    Kali ini saya akan membagikan kepada anda semua tutorial photoshop lanjutan dari edisi sebelumnya yaitu tutorial photoshop top secret DVD 2, untuk melihat lebih detail dari isi kontent dari tutorial tersebut lihat daftar yang ada dibawah dari posting ini. kapasitas file lumayan besar terdiri dari 9 part dengan masing-masing part sebesar 500 MB. tapi anda tidak perlu khawatir karena anda mendownload file tutorial photoshop ini langsung dari server directory, link yang saya bagikan langsung anda copy ke software download, anda bisa pause dan lanjutkan mendownload kapan saja anda mau.

    Content Photoshop Top Secret DVD 2 :

    Photoshop Top Secret DVD 2

    Painting a Portrait
    Digitally paint a portrait from a
    photographic reference.
    Swapping Faces
    How to take the face from one photo
    and place it into a completely different one.
    Pop Art
    Turn a Photograph into artwork
    that was popular in the mid 1950’s.
    Applying Tattoos
    How to apply henna and tattoos to skin.
    Masking Fur
    Seamlessly remove the background
    from furry animals.
    Vanishing Point
    What Vanishing Point is and how
    to edit images with perspective.
    Web Graphics
    Learn how to create commonly
    used web graphics and screen shots.
    Shattered Type
    Create the illusion that text
    is being shattered like glass.
    Flower Greeting Card
    Use the vector tools in Photoshop to
    create an elegant looking Greeting Card.
    Creating DVD Covers
    Mark shows you exactly how he created
    the Photoshop Top Secret DVD covers.

    Homepage: http://www.photoshoptopsecret.com
    Download: Click Here


    Like
    ccc

    Add to Cart

    Photoshop Top Secret DVD 1 Free Download

    Photoshop Top Secret DVD 1 Free Download

    Photoshop Top Secret DVD 1

    Photoshop Top Secret DVD 1

     Adobe Photoshop Training Course
    iso - 4,34 GB

    Bagaimana Menjadi Photoshop "Black Belt"-Cepat!

    Hanya dirilis oleh Mark Monciardini, Photoshop Top Secret adalah Photoshop Ekstrim Kursus Pelatihan yang mengajarkan Anda, langkah demi langkah, cara membuat cutting-edge grafis dan efek khusus dengan Adobe Photoshop. Ini siswa-ramah di rumah kursus belajar meliputi empat DVD-ROM dengan lebih dari 16 gigabyte video tutorial dan file proyek. Hal ini juga dilengkapi dengan sebuah buku galeri penuh warna (cetak, bukan pdf) yang menunjukkan hasil akhir dari setiap proyek dalam kursus. Anda dapat melihat, belajar, berlatih, dan menguasai teknik-teknik canggih di mana pun Anda berada, tanpa perlu untuk kelas mahal atau tutor.

    Buat Poster, Covers Film, Graphics Surreal dan banyak lagi!

    Kursus ini akan mengajarkan Anda bagaimana menjadi Photoshop ultimate "sabuk hitam" untuk bersenang-senang dan / atau laba. Anda akan belajar cara membuat tingkat atas efek khusus untuk eye-catching poster film, sampul album, sampul buku, brosur, potongan surat, sampul majalah, ilustrasi artikel, dan berbagai sangat luas iklan cetak dan grafis situs Web

    Photoshop Top Secret DVD 1

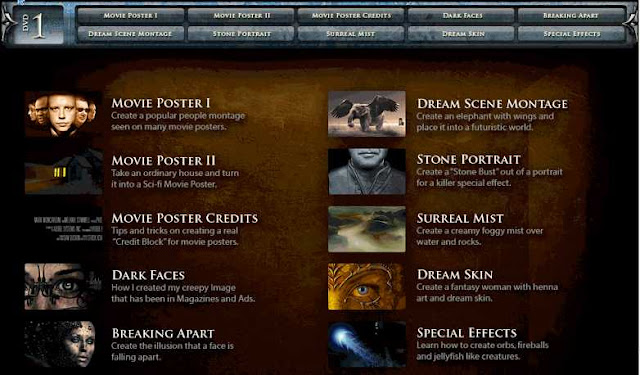
    Content: 

    Movie Poster Design I
    Create a popular people montage seen
    on many movie posters.
    Movie Poster Design II
    Take an ordinary house and turn it into a 
    Sci-fi Movie Poster.
    Movie Poster Credits
    Tips and tricks on creating a real “Credit Block” 
    for movie posters.
    Dark Faces
    How I created my creepy Image that has been
    in Magazines and Ads.
    Breaking Apart
    Create the illusion that a face is
    falling apart.
    Dream Scene Montage
    Create an elephant with wings and
    place it into a futuristic world.
    Stone Portrait
    Create a “Stone Bust” out of a portrait
    for a killer special effect.
    Surreal Images
    Create a creamy foggy mist over
    water and rocks.
    Dream Skin
    Create a fantasy woman with henna
    art and dream skin.
    Special Effects
    Learn how to create orbs, fireballs 
    and jellyfish like creatures

    Download : Click Here


    Like
    ccc

    Add to Cart

    Tutorial Adobe Illustrator dari Total Training Free Download

    Tutorial Adobe Illustrator dari Total Training Free Download

    alt
    Free Download
    Total Training : Adobe Illustrator CS5 Essential Training

    Chapter 1: ILLUSTRATOR INTERFACE & SETUP (32 min)
    1. Opening & Arranging Multiple Documents
    2. The Interface
    3. Customizing & Saving Workspaces
    4. Setting Preferences
    5. Navigation
    6. Zooming & Panning
    7. Editing Keyboard Shortcuts

    Chapter 2: DOCUMENT SETUP, TEMPLATES & ARTBOARDS (37 min)
    1. Creating a New Document
    2. Editing Existing Documents
    3. Editing Document Size via Artboards
    4. Setting Up Multiple Artboards
    5. Editing Multiple Artboards
    6. Artboard Ruler Origins
    7. The Artboards Panel
    8. Creating & Saving Templates

    Chapter 3: CREATING OBJECTS, GUIDES &LAYERS (35 min)
    1. Rulers, Guides & Grids
    2. Points, Paths, Fills & Strokes
    3. Outline & Preview Modes
    4. Default Fill & Stroke
    5. Creating Shapes of a Specific Size
    6. Creating Circles from the Center Point
    7. Drawing with the Star Tool
    8. Using the Split Into Grid Command
    9. Using the Paste Remembers Layers Command

    Chapter 4: OBJECT EDITING ESSENTIALS (26 min)
    1. Utilizing the Selection Tools
    2. Free Transforming
    3. Stroke Scaling
    4. Using the Transform Panel & Nudging
    5. Grouping
    6. Working in Isolation Mode
    7. Changing Object Stacking Order

    Chapter 5: TRANSFORMATION, DUPLICATION & ALIGNMENT (29 min)
    1. Rotating
    2. Reflecting
    3. Scaling
    4. Progressive Scaling
    5. Alignment
    6. Power Duplication

    Chapter 6: COLOR, GRADIENTS & PATTERNS (29 min)
    1. Creating Dense Black
    2. Creating & Using Global Swatches
    3. Applying Pantone® Spot Colors
    4. Creating Gradients & the Gradient Annotator
    5. Creating Basic Pattern Swatches
    6. Fine-Tuning & Scaling Patterns
    7. Updating & Replacing Patterns

    Chapter 7: DIFFERENT STROKES (18 min)
    1. Adding & Distributing Lines
    2. Adding Strokes
    3. Working with Stroke Alignment & Dashed Lines
    4. Applying Arcs & Arrowheads

    Chapter 8: SHAPE BUILDER & PATHFINDER (21 min)
    1. Exploring Drawing Modes
    2. Using Select Same & Pathfinder Options
    3. Combining with the Shape Builder Tool
    4. Trimming with the Shape Builder Tool
    5. Using Transform Each

    Chapter 9: CUSTOM SHAPE CREATION & EDITING (16 min)
    1. Cutting & Joining Paths
    2. Applying a Stroke Profile & Merging Swatches
    3. Using Pathfinder to Create a Custom Shape
    4. Utilizing Points & Segments to Create a Custom Shape

    Chapter 10: DRAWING & REFINING PATHS (23 min)
    1. Freeform Drawing with the Pencil Tool
    2. Refining a Shape with the Warp Tool & Pathfinder
    3. Drawing Corners & Bezier Curves with the Pen Tool
    4. Constructing More Intricate Shapes
    5. Adding the Finished Shapes to the Main Artwork

    Chapter 11: TYPE, STYLES & TYPOGRAPHY (37 min)
    1. Creating Single-Line Type
    2. Kerning & Styling Type
    3. Grouping & Scaling the Logo Type
    4. Working with Area Type
    5. Placing Type
    6. Creating & Applying Paragraph Styles
    7. Flowing Text between Custom Frames
    8. Adding Type around a Circle
    9. Adding Baseline Shift to the Type around a Circle

    Chapter 12: WORKING WITH IMAGES & MASKS (29 min)
    1. Placing Images & the Links Panel
    2. Using Edit Original
    3. Creating a Clipping Mask to Mask an Image
    4. Continuing with Clipping Masks to Mask Artwork
    5. Working with Layered Photoshop® Files
    6. Applying Effects & the Appearance Panel

    Chapter 13: LIVE TRACE TIPS & TRICKS (14 min)
    1. Live Tracing an Image
    2. Outputting Live Trace Spot Colors to Swatches
    3. Merging Live Swatches with Pantone® Swatches

    Chapter 14: THE POWER OF APPEARANCE (27 min)
    1. Using Transparency & Blend Modes
    2. Saving & Using Graphic Styles
    3. Editing & Auto-Updating Graphic Styles
    4. Creating Compound Paths
    5. Applying Strokes with the Appearance Panel
    6. Adding & Editing a Drop Shadow Effect

    Chapter 15: ADDING SOME POLISH (15 min)
    1. Designing an HD Interstitial Graphic
    2. Creating a Reflection
    3. Creating a Transparent Gradient

    Chapter 16: PRINTING, EXPORTING & PDF FILES (15 min)
    1. Setting the Print Area with the Print Tiling Tool
    2. Adjusting Basic Print Options
    3. Format Options for Exporting
    4. Exporting a PDF for Print

    Chapter 17: WEB PREPARATION & EXPORT (16 min)
    1. Using Pixel Preview & Align to Pixel Grid
    2. Adjusting Anti-Aliasing on Type
    3. Creating & Naming Slices
    4. Saving for the Web
    5. Credits

    DOWNLOAD


    Like
    ccc

    Add to Cart

    Adobe Photoshop Starting From Scratch Kelby Training

    Adobe Photoshop Starting From Scratch Kelby Training

    Adobe Photoshop Starting From Scratch Kelby Training

    Adobe Photoshop Starting From Scratch Kelby Training

    Dalam kursus karya senirupa graphic design untuk program adobe photoshop ini membahas fungsi mode campuran dalam berbagai skenario seperti image restoration, sharpening, adjustments, special effects graphic design, dan banyak lagi. Sepanjang jalan Anda didorong untuk bereksperimen dengan mode campuran dengan cara yang berbeda daripada yang ditampilkan. Dengan setiap skenario proyek yang berbeda, itu baik untuk menjadi akrab dengan berbagai kemungkinan dalam menciptakan karya senirupa anda yang indah dan fantastik.

    Lesson Detail :

    Lesson 01 Introduction (1:02)
    Lesson 02 What Are Blend Modes? (8:01)
    Lesson 03 6 Most Commonly Used Blend Modes (5:21)
    Lesson 04 Exposure Tricks (5:51)
    Lesson 05 Compositing Tricks (6:51)
    Lesson 06 Background/Border Effects (10:10)
    Lesson 07 Layer Style Effects (7:52)
    Lesson 08 Blending Textures (6:32)
    Lesson 09 Sharpening Images (4:20)
    Lesson 10 Filter Effects with Blend Modes (5:39)
    Lesson 11 Restoring Images (5:03)
    Lesson 12 Adjustment Layers (5:28)
    Lesson 13 Specialty Blend Modes (7:56)
    Lesson 14 Brushes & Blend Modes (8:19)
    Lesson 15 Color and Black and White Effects (6:03)
    Lesson 16 Retouching (3:23)
    Lesson 17 Masking Techniques (11:27)
    Lesson 18 Image Effects with Blend Modes (4:12)
    Lesson 19 Design Effects with Blend Modes (6:44)
    Lesson 20 Conclusion (1:08)


    Webpage : http://kelbytraining.com
    Download : click here


    Like
    ccc

    Add to Cart

    Tutorial Adobe Photoshop CS4 Selections and Masks

    Tutorial Adobe Photoshop CS4 Selections and Masks

    Adobe Photoshop CS4 Selections and Masks

    Adobe Photoshop CS4 Selections and Masks

    Mampu membuat pilihan yang akurat adalah salah satu keterampilan yang paling penting dalam adobe Photoshop dan membuat mereka pilihan cepat dan tanpa kesulitan adalah sama pentingnya. Join Dave Cross tutorial karena ia mencakup semua alat kunci dan teknik untuk menggunakan Selections and Masks.
    Mulai dari bawah ke atas, dalam hal ini Adobe Photoshop CS4 dan Selections and Masks Anda akan belajar:

    * Perbedaan antara selections dan masks dan mengapa hal itu penting untuk menggunakan keduanya
    * Cara menggunakan alat seleksi secara individual dan bersama-sama sebagai "toolkit seleksi"
    * Contoh yang selection tools untuk digunakan dalam situasi yang berbeda
    * Fine-tuning pilihan menggunakan Quick Mask dan Refine Edges
    * Cara menggunakan Channels untuk memilih subject yang sulit seperti rambut
    * Membuat masks dari selections dan fine-tuning masks

    Anda juga akan melihat ketika tidak mungkin diperlukan untuk membuat selection sama sekali, dan ikuti bersama sebagai Dave bekerja melalui beberapa contoh-contoh nyata. Membuat Selections and Masks adalah dua keterampilan yang Anda akan menggunakan waktu dan waktu lagi dan semakin baik dalam membuat karya anda, segala sesuatu mudah dan dapat di kerjakan di adobe Photoshop

    Course Detail Adobe Photoshop Selections and Masks :

    Introduction (00:43)
    Course instructor Dave Cross gives a general overview of what will be covered in these classes
    Selections Versus Masks (06:34)
    See the difference between selections and masks, and why it is important to use both
    Overview of Tools and Select Menu (05:17)
    A quick overview of the key selection tools and functions
    Marquee Tools (06:58)
    How to use the Rectangular and Elliptical Marquee tools
    Lasso Tools (09:09)
    How to use the Regular, Magnetic and Polygonal Lasso tools, including how to switch between them on the fly
    Quick Selection Tool/Magic Wand (05:28)
    Learn how to make automatic selections with the Magic Wand and Quick Selection tools
    Quick Mask (09:58)
    Change the view of your selection and adjust that selection using Quick Mask
    Pen Tool (07:39)
    An overview of using the Open tool to draw (and edit) a path that can be turned into a selection
    Bonus: Extract (05:34)
    Learn about the optional Extract Filter: how to install and use it
    Fine-Tuning Selections (07:17)
    How to make your selection more accurate by fine-tuning the selection edge
    Refine Edges (06:22)
    See how the Refine Edge option lets you adjust the edge of your selection with a live preview
    Color Range (10:02)
    Learn how Color Range can help you select a specific range of colors throughout a document in a more interactive way than the Magic Wand
    Bonus: Taking Better Photos (03:50)
    If you are the one taking the photo, make less work for yourself
    Making a Mask From a Selection (07:06)
    How to turn your selection into an Alpha Channel or a Layer Mask
    Editing a Mask (07:26)
    Paint on the mask and use the Masks panel to get a better edge
    Channel-Based Selection (11:38)
    For complex selections, start with a channel to create a mask
    Bonus: When Not To Make a Selection (04:26)
    Sometimes you may not need to make a selection
    Example 1 (04:40)
    Watch a real-world example of making a complex selection
    Example 2 (11:31)
    Watch a real-world example of making a challenging selection
    Conclusion (00:31)
    Thanks for watching. You are ready to go out and make some selections and masks

    Adobe Photoshop CS4 Selections and Masks

    Publikasi : Kelby Training
    Author : Dave Cross
    Bahasa : English
    Genre : training
    File Size :512 MB
    Software : Adobe Photoshop CS4
    Download : Click Here
    Pasword : photoshop
    Cara download : click Here

    Like
    ccc

    Add to Cart

    Painting Fantasy Portrait Photoshop Top Secret

    Painting Fantasy Portrait Photoshop Top Secret


    Painting Fantasy Portrait Photoshop Top Secret dvd 5

    Dalam video ini berisi tutorial photoshop  yang berasal dari Tutorial Photoshop Top Secret DVD V Bonus. dengan Author Melanie Stimmel, sebuah teknik melukis digital menggunakan komputer dimana Monitor sebagai kanvas dan Mouse sebagai keybord. aplikasi yang digunakan adalah adobe photoshop.
    Jika anda ingin mendownload full video tutorial ini yakni Tutorial Photoshop Top Secret DVD 5 Bonus secara gratis dan cuma-cuma silahkan klik disini
    Like
    ccc

    Add to Cart

    CG Academy 3Ds Max Modelling Fundamental 4

    CG Academy 3Ds Max Modelling Fundamental 4

    CG Academy 3Ds Max Modelling Fundamental 4
    CG Academy 3Ds Max Modelling Fundamental 4
    Sub D's & Combined Techniques
    DVD 6 3Ds Max | 6 Hours, 38 Minutes | 3,37 GB

    You really can't get any more fundamental a need in most CG productions than Modelling. Whether it be an accurate model of a new building design, a mechanical model of a vehicle or prop, to a fantasy creature or photo real human model. Most productions will need models to fill the on screen roles needed to tell their narative.
    Our series of modelling DVDs will build your skills both in mechanical and natural modelling realms with titles that cover this broad topic at every level. Also we will look at taking your models one stage further with procedural techniques that can make your models become tools in their own right to further speed up your modelling processes.


    Content :
    Chapter 01: Sub-D Modelling, A History
    First we look at how the current implementation of Sub-D modelling came about as a reaction to some of the short-comings of NURBS modelling.

    Chapter 02: A NURBS Like Surface
    To understand current Sub-Ds, we have to understand NURBS. Here Chris gives you a brief introduction to the anatomy and features of NURBS.

    Chapter 03: The Sub-D Surface, Polygon Types
    Quad polygons give the best results when working with Sub-Ds, but why? Here Chris explains.

    Chapter 04: Controlling Curvature
    We now explore a key concept of Sub-Ds, in how you control the curvature of the surface via the proximity of it control points.

    Chapter 05: How To Create
    We know what they are, and how to control their form. But how do we create these surfaces in the first place?

    Chapter 06: The MeshSmooth Modifier
    We take an in-depth look here at how the most comprehensive smoothing system works.

    Chapter 07: TurboSmooth & NURMS Smoothing
    Having mastered the intricacies of the MeshSmooth Modifier, we take a look at the more pared down TurboSmooth and the built in NURMS smoothing in the E-Poly mesh type.

    Chapter 08: Editable Poly - Edges
    Now Chris takes us through how we can effectively select and model using the E-Polys Edge sub objects.

    Chapter 09: Editable Poly - Vertices
    And we continue with a similar look at how we can do the same with an E-Polys Vertices.

    Chapter 10: Editable Poly - Polygons & Borders
    And we complete this section by looking at how we can use the E-Polys Polygon and Border modelling tools.

    Chapter 11: Modelling The Cart - Running Boards
    Now we return to our series wide modelling project, the go-cart. We make a start here by modelling its running boards using Sub-Ds.

    Chapter 12: Modelling The Cart - The Mudguards
    We continue modelling by tackling the mudguards using Sub-Ds.

    Chapter 13: Modelling The Cart - Hood & Seat
    And now Chris shows us how we can model the carts hood and its drivers seat.

    Chapter 14: Modelling The Cart - The Drive Cog
    And we complete this section by modelling the carts drive cog, which we started in the previous DVD.

    Chapter 15: E-Poly & Shell Modifiers
    Now we look at how we can use the Sub-D tools and the Shell Modifier to enhance elements we created earlier in this series and this DVD.

    Chapter 15: Optimized Smoothing
    The smoothing inherent in the Sub-D surface can bog down viewport performance if not handled with care. Here Chris show how to optimize this area.

    Chapter 15: Procedural Modelling
    Procedural modelling is a workflow that effects all of the areas covered in this series. Here Chris demonstrates what Proceduralism offers.

    Homepage: http://www.cg-academy.net
    Download: Click Here


    Like
    ccc

    Add to Cart

    3Ds Max Modelling Fundamental 3 Spline Based Tools

    3Ds Max Modelling Fundamental 3 Spline Based Tools

    3Ds Max Modelling Fundamental 3 Spline Based Tools
    Free Download
    CG Academy 3DMax Modelling Fundamental 3 : Spline Based Tools
    DVD 3DsMax | 6 Hours, 17 Minutes | 2,22 GB


    You really can't get any more fundamental a need in most CG productions than Modelling. Whether it be an accurate model of a new building design, a mechanical model of a vehicle or prop, to a fantasy creature or photo real human model. Most productions will need models to fill the on screen roles needed to tell their narative.
    Our series of modelling DVDs will build your skills both in mechanical and natural modelling realms with titles that cover this broad topic at every level. Also we will look at taking your models one stage further with procedural techniques that can make your models become tools in their own right to further speed up your modelling processes.

    Content :
    Chapter 01: History Of Curve Primitives
    Chris kicks off the DVD with a brief history of how curves were first developed for 3D software in automotive design in France.

    Chapter 02: Bezier Curves - Fundamentals 1
    We continue with a look at the fundamental concepts behind their implementation in 3dsmax via Bezier Splines.

    Chapter 03: Bezier Curves - Fundamentals 2
    And we continue by looking at further aspects of Bezier Splines.

    Chapter 04: Vertices & Interpolation
    For these mathematically perfect curves to be of use we need to convert them first into straight lines and in turn polygons. We look at this issue here.

    Chapter 05: Spline Editing & Practical Tips
    When working with B-Splines in 3dsmax, there are certain workflows that will give you the best results in the shortest period. Chris runs through how to edit Splines here and gives some tips and tricks.

    Chapter 06: Curve Based Modelling Overview
    We know how to create Splines and how to edit them. But now we learn how we can convert those curves into 3D forms.

    Chapter 07: The Extrude Modifier
    We now take a look at the tools for creating 3D forms from Splines. The first method we look at is the relatively simple, yet very useful Extrude Modifier.

    Chapter 08: Lathe Modifier
    Then Chris shows us how the Lathe Modifier works.

    Chapter 09: Loft Compound Object - PT1
    And we complete this section by taking an in-depth look at the Loft Compound Object, which can be thought of as a combination Extrude/Lathe tool on steroids.

    Chapter 10: Loft Compound Object - PT2
    Chris continues his explanation of this comprehensive and flexible tool here.

    Chapter 11: Loft Compound Object - PT3
    And we conclude this section here by looking at the Loft deformation options.

    Chapter 12: Go-Cart Modelling - Steering Column
    Now we have a grasp of the Spline based tools, we make a start on modelling some go-cart model elements using a combination of them.

    Chapter 13: Go-Cart Modelling - Steering Wheel
    We continue modelling by creating the carts steering wheel and other elements.

    Chapter 14: Go-Cart Modelling - Wheels & Tyres
    And we complete this section by modelling the carts wheel hubs and tyres.

    Chapter 15: Curves In Animation
    And we conclude with a brief look at how Splines can also be used for animation in a number of ways


    Homepage: http://www.cg-academy.net
    Download: Click Here


    Like
    ccc

    Add to Cart

    3Ds Max Modelling Fundamental 2 Polygonal Mesh Modelling

    3Ds Max Modelling Fundamental 2 Polygonal Mesh Modelling

    3Ds Max Modelling Fundamental 2 Polygonal Mesh Modelling
    CG Academy Tutorial
    3Ds Max Modelling Fundamental 2 : Polygonal Mesh Modelling
    DVD 3DsMax | 4 Hours, 1 Minute | 1,75GB


    You really can't get any more fundamental a need in most CG productions than Modelling. Whether it be an accurate model of a new building design, a mechanical model of a vehicle or prop, to a fantasy creature or photo real human model. Most productions will need models to fill the on screen roles needed to tell their narative.
    Our series of modelling DVDs will build your skills both in mechanical and natural modelling realms with titles that cover this broad topic at every level. Also we will look at taking your models one stage further with procedural techniques that can make your models become tools in their own right to further speed up your modelling processes.

    Content :
    Chapter 01: EMesh - Structure & SubObjects
    Chris starts with a look at the basic elements that make up the Editable Mesh geometry type.

    Chapter 02: Creating Faces & Issues
    We look at how we can create new faces within an e-mesh from scratch, and also at issues that can arise during face creation and editing.

    Chapter 03: Attach/Detach & Weld/Split
    Chris then shows us how we can detach parts of the e-mesh into a separate object, and also how we can attach meshes together.

    Chapter 04: Manipulation & Soft Selections
    Here we learn how we can effectively manipulate the sub elements of the mesh and how to use the soft selection system for more organic adjustments.

    Chapter 05: E-Mesh - Smoothing & Material IDs
    Now we explore how we can define smoothing boundaries on our mesh and also how to define material ids, allowing more than one material on a single scene object.

    Chapter 06: E Poly - Structure & Sub-Objects
    Now we have a decent grasp of the E Mesh Chris moves on to explore the E Polys unique features. We make a start with its sub elements.

    Chapter 07: Edge-Rings & Loops
    A Key feature of the E Poly are the Edge Ring and Loop selection and editing tools. We take a brief look at these features here. (We will return to this topic in-depth in DVD 4 in the series on Sub-D modelling).

    Chapter 08: Setting-Up The Go-Cart Frame
    Now we have a firm grasp of both mesh types, we move on and start preparation for modelling elements of our go-cart model using poly modelling techniques.

    Chapter 09: Continuing The Frame
    Chris shows us how to model the entire carts frame from a Primitive, using an E Poly centric workflow.

    Chapter 10: Refining The Frame
    We then return the basic frame and refine it further in a number of areas using a variety of tools.

    Chapter 11: Modelling Tips & Best Practices
    With the modelling out of the way Chris runs through a number of modelling tips and best practices.

    Chapter 12: Scene Organisation Techniques
    And we complete this DVD with a look at some methods you can use to better organise your modelling.

    Homepage: http://www.cg-academy.net
    Download: Click Here


    Like
    ccc

    Add to Cart

    CG Academy 3Ds Max Modelling Fundamental 1

    CG Academy 3Ds Max Modelling Fundamental 1

    CG Academy 3Ds Max Modelling Fundamental 1
    Free Tutorial 3Ds Max
    CG Academy 3Ds Max Modelling Fundamental 1: Primitives & Poly Fundamentals
    DVD 3DSMax | 5 Hours 26 Minutes | 2,81GB


    You really can't get any more fundamental a need in most CG productions than Modelling. Whether it be an accurate model of a new building design, a mechanical model of a vehicle or prop, to a fantasy creature or photo real human model. Most productions will need models to fill the on screen roles needed to tell their narative. Our series of modelling DVDs will build your skills both in mechanical and natural modelling realms with titles that cover this broad topic at every level. Also we will look at taking your models one stage further with procedural techniques that can make your models become tools in their own right to further speed up your modelling processes.

    Content:
    CH 01: Efficient Scene Navigation
    We make a start by looking at how we can effectively navigate within 3dsmax's 3D workspace.

    CH 02: Keyboard Shortcuts & Interface
    Then we look at the most commonly used keyboard shortcuts and user interface features for modelling.

    CH 03: What Are Polygons?
    Polygons are fundamental to all current modelling systems. We find out what they are here and why they are so important.

    CH 04: Editable Mesh & Editable Polygons
    Then we learn the differences between the two current polygon mesh types in 3dsmax.

    CH 05: Primitives & Tessellation
    Chris then shows us what Primitives are, and how they are tessellated into visible 3D objects via polygons.

    CH 06: Coordinate Systems
    We then explore what Coordinate Systems are and how they define our 3D world.

    CH 07: The Home-Grid & Snaps
    Chris then continues by looking at how we can organise those spaces via Grids, and make our modelling more precise by Snapping to those grids whilst modelling.

    CH 08: Pivots & Custom Grids
    Our objects are manipulated in space via their Pivots. Here we expore these reference points and also the creation of Custom Grids.

    CH 09: Modifiers & The Stack
    Now we look at one of 3dsmax's main features and key methods for altering primitives, Modifiers and the Stack.

    CH 10: Spacewarps
    A system akin to Modifiers, called Spacewarps is explored here. We find how Spacewarps and Modifiers are closely related but uniquely featured.

    CH 11: Basic Primitive Usage
    Now we put what we have learnt so far to practical use, by modelling elements of a go-cart by using Primitives.

    CH 12: Using The Bend Modifier
    Having created a number of simple model elements we now modify some of them using the Bend Modifier.

    CH 13: The U-Bend & Finishing Up
    And once comfortable with this, we try something a little more complex by creating a U-bend using a number of modifiers and sub-selections


    Download: Click Here


    Like
    ccc

    Add to Cart

    Tutorial 3DS Max CG Academy 3DMax Workflow 2 Intermediate

    Tutorial 3DS Max CG Academy 3DMax Workflow 2 Intermediate

    CG Academy 3DMax Workflow 2 Intermediate
    CG Academy 3DMax Workflow 2 Intermediate
    DVD 3DMax | 3jam 12 Menit | 1,84GB


    When working on a production, its common to work as a part of a large team, with each member working on a specific area of that project. This is reflected within the software itself, with each part of the software targeting a specific need such as modelling, texturing, lighting, and particle effects. CG Academy caters to these disciplines with an in depth series of DVDs on each skill set.
    However, within our Workflow series, we look beyond these specific areas to the global concerns of our package of choice and production as a whole. We also explore features that define your software, for instance with 3dsmax we look at how we can use its prodecural design within our workflow. You can think of workflow as the glue that bonds the various disciplines together, how we move from modelling to texturing, from finished models to rigging them and so on, giving us a greater insight into the wider topic of 3d computer graphics.


    Content:
    CH 01: What Is Proceduralism?
    A brief introduction to the concepts that lie behind Proceduralism, such as Nodes, Parameters and Controllers.

    CH 02: Working With Nodes & Proceduralism
    To give us a broader insight into what a Procedural workflow is, in this chapter we take a brief look at the same procedural task tackled in 3 different packages, 3dsmax (of course), Maya and also Houdini.

    CH 03: The Stack, Friend or Foe?
    The Stack can be a daunting and confusing prospect to new users of 3dsmax and 3D software in general. Here we look at how it can be used to make our workflow easier and more flexible.

    CH 04: Instancing & Referencing
    An important feature of most Procedural systems is the ability to share and re-use nodes, parameters and controllers across the package. We look at what this offers us here...

    CH 05: Base Objects & Conversion
    All objects in 3dsmax are based on a number of core base geometry types, we look at them here and how we can convert between them at will.

    CH 06: Working With The Stack
    Here we return to the Stack to look at how it functions in more detail. How we can manipulate the modifiers to do what we want and gain mastery over this crucial 3dsmax interface element.

    CH 07: The Modifiers
    The Modifiers are the elements that we use to build our procedural systems via the Stack. Here we run through the functionality of each major group briefly.

    CH 08: Passing It On & Topological Dependency
    Some Modifiers and situations are such that they are totally dependant on the geometry and sub selections passed to them. We explore those issues here.

    CH 09: Experimentation Without Risks
    Finally we look at how a procedural workflow also allows us to experiment during our workflow with no real risk, and also how to use proceduralism to fix errors we may have made during modelling.

    Download: Click Here


    Like
    ccc

    Add to Cart

    CG Academy 3Ds MAX Workflow Fundamental 1

    CG Academy 3Ds MAX Workflow Fundamental 1

    CG Academy 3Ds MAX Workflow Fundamental
    Tutorial 3Ds Max
    CG Academy 3Ds MAX Workflow Fundamental 1
    DVD 1 3DMax | 5 jam 26 Menit | 2,15GB


    When working on a production, its common to work as a part of a large team, with each member working on a specific area of that project. This is reflected within the software itself, with each part of the software targeting a specific need such as modelling, texturing, lighting, and particle effects. CG Academy caters to these disciplines with an in depth series of DVDs on each skill set.
    However, within our Workflow series, we look beyond these specific areas to the global concerns of our package of choice and production as a whole. We also explore features that define your software, for instance with 3dsmax we look at how we can use its prodecural design within our workflow. You can think of workflow as the glue that bonds the various disciplines together, how we move from modelling to texturing, from finished models to rigging them and so on, giving us a greater insight into the wider topic of 3d computer graphics.

    Content:
    Chapter 01: The Viewports
    An introduction to 3dsmax’s basic Viewport layout, how to navigate around it and how to customize it to your preference.

    Chapter 02: The Transform Gizmos
    How to use the Transform Gizmo to transform, rotate and scale an object.

    Chapter 03: The Command Panel
    An introduction to The Command Panel and its various sub-panels.

    Chapter 04: The Toolbar
    A quick run-through of the various main Toolbar icons and the functionality they access.

    Chapter 05: The Menus
    A brief introduction to the menu system options.

    Chapter 06: Final Elements
    To complete the user interface section we look at the other main UI windows, such as the Material Editor, Particle View, the time-line and so on.

    Chapter 09: Modelling
    An introduction to basic poly-modelling workflow

    Chapter 10: Rigging & Animation
    We continue the tutorial by applying some basic rigging to our models and then we apply some basic animation to create an animation effect. Of a swinging fireball.

    Chapter 11: Particles
    We enhance our scene next with a Particle Flow system to add flames and sparks to our fireball.

    Chapter 12: Lighting & Texturing
    Next we texture our scene to make the plinth appear like rock, a rock Mayan relief on the floor and of course a fiery effect to our fireball. Then we light it to match.

    Chapter 13: Completed Renders
    After rendering our scene we compare the different rendering qualities we get from a basic render, and one that uses bounce-light.

    Download: Click Here


    Like
    ccc

    Add to Cart